How do I directly install on Android from our app
Not all Android models are eSIM-compatible, so it's important to verify that your device supports eSIMs before proceeding.
Once you have confirmed that your Android device is eSIM-compatible and carrier-unlocked, you can follow these steps to set up your Virgin connect roam eSIM.
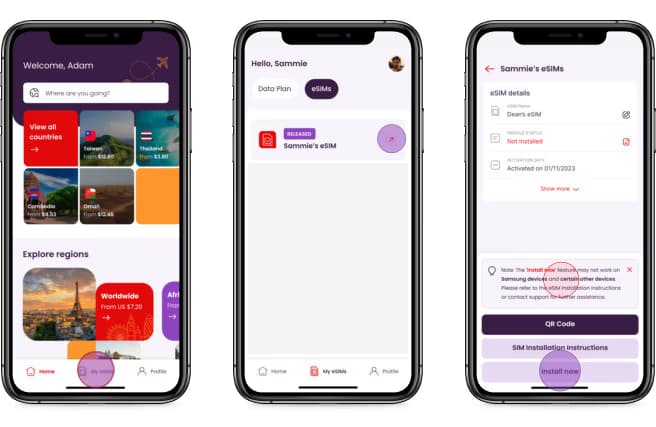
2. Go to 'My eSIMs' and tap on your eSIM.
3. Tap 'Install now'.
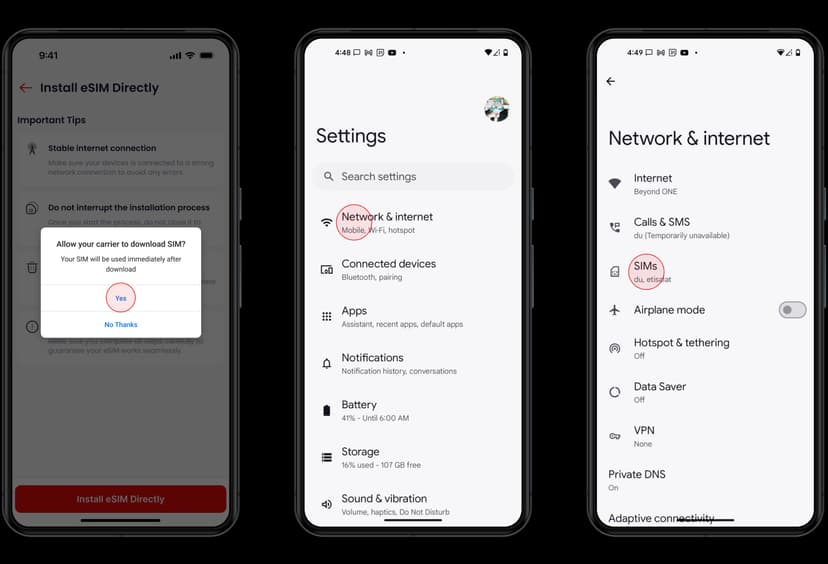
5. Go to Settings > Network & Internet > SIMs.
6. Tap on BICS.
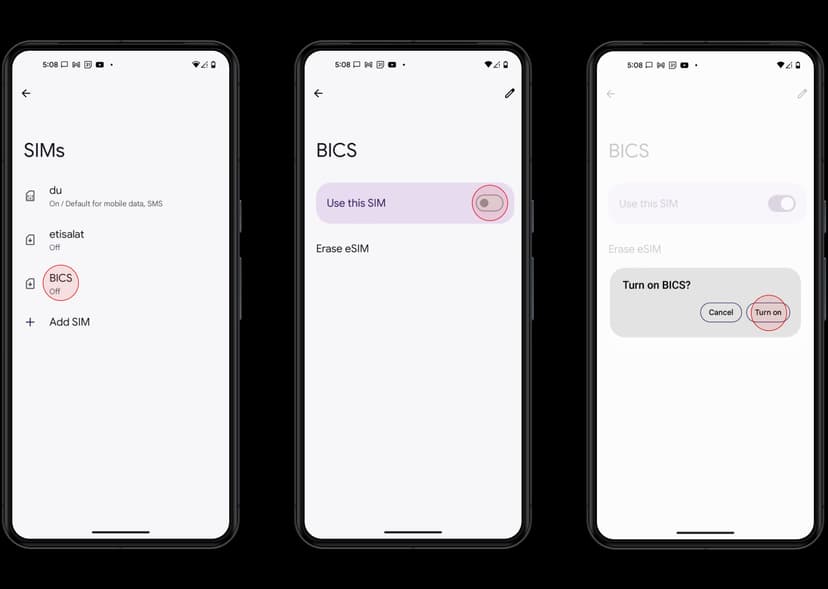
7. Turn on 'Use this SIM'.
8. Tap 'Turn on' to confirm.
9. Tap 'Yes' to use two SIMs.
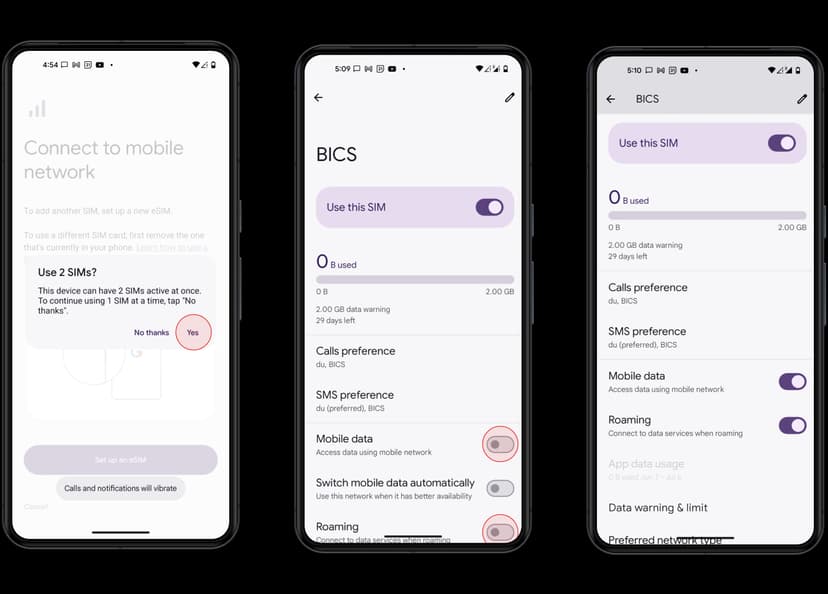
10. Turn on Mobile Data and Roaming if you want to switch seamlessly to your data plan when you arrive at your destination. Good news: you won't start using data until you arrive.
And that's it! Your new eSIM is installed, and you're ready to connect.
I couldn't install my eSIM
Okay, let's work out why.
1. Make sure your device is network unlocked. To check: Go to Settings > Connections or Network & Internet > Mobile network > Network operators. Turn off 'Select automatically'. If you see lots of available networks, your device is probably unlocked. If you only see one network, it's probably locked. You can ask your carrier to unlock it.
2. Check if your device is compatible with eSIM. Search online for your make and model and 'eSIM compatible'. If it's not, consider using a different device, or getting a compatible model next time you upgrade. We'll be right here when you're ready. And in the meantime, you can request a refund for your data plan in our app.
By following these steps, you should be able to successfully install and set up an eSIM on your Android device. If you have any questions, please feel free to contact our support team, and we'll be happy to help!